


Video Installation Guide
Watch our step-by-step video guide to easily install your motorized skylight shades.
Step-by-Step Guide
4 Pre-Installation Steps for Motorized Skylight Shades
Step 1: Gather Tools
Step 2: Check Your Package
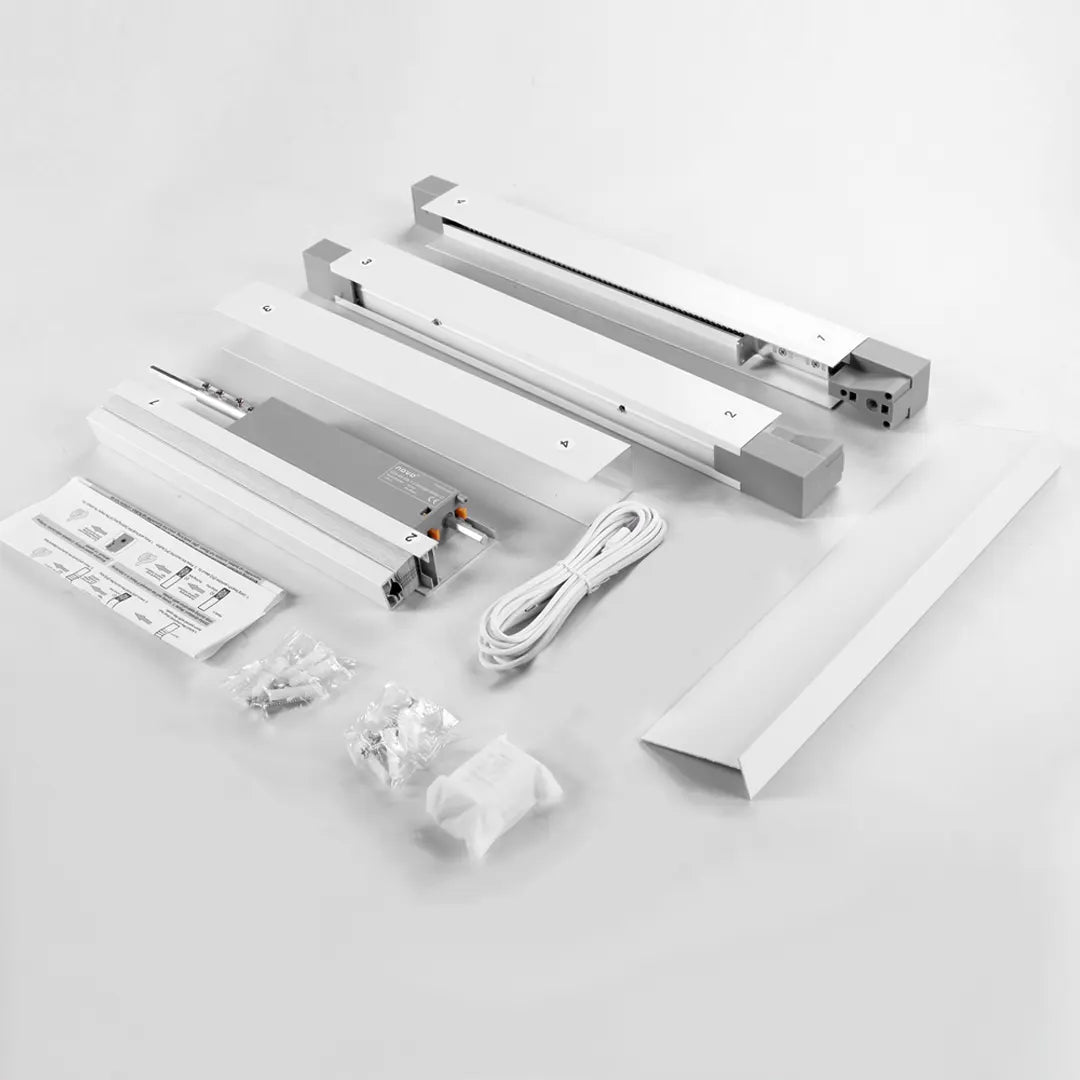
Motorized skylight Shade Installation Kit
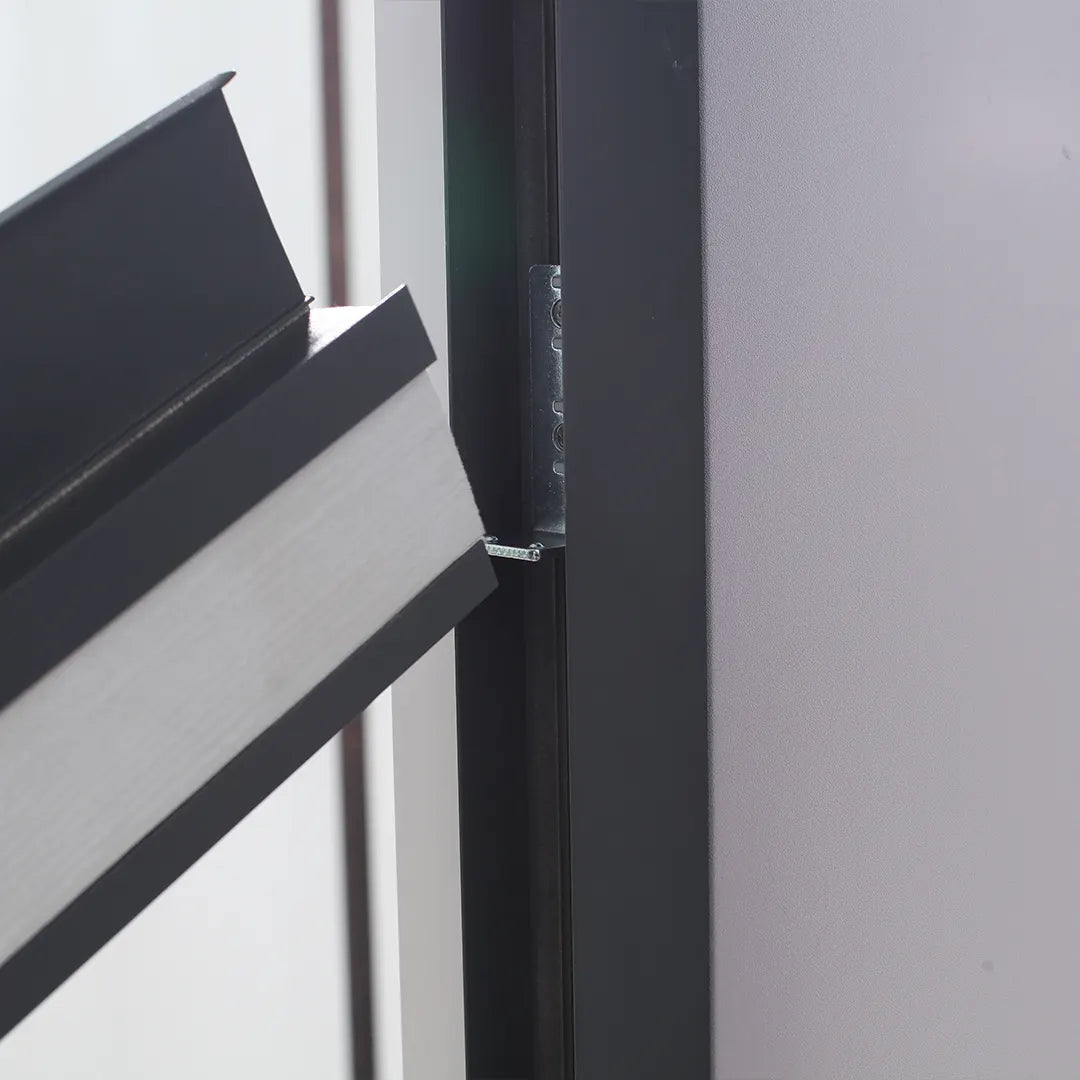
Step 3: 4 Steps to Complete the Positioning of Your Motorized Skylight Shade Components Before Installation
-

No. 1
-

No. 2
-

No. 3
-

No. 4
-

Final Result


Step 4: Mark the Mounting Positions

Position and Mark the Frame
Position the skylight shade’s aluminum frame in the intended location on the skylight (do not fasten yet). Use a pencil to trace along the inner edges. Once all four sides are marked, you will have a clear rectangular outline as your installation guide.
Tip: Always mark in a clear, unobstructed area so the skylight shade can operate without interference from handles or other obstacles.
Quick Installation
Follow our simple steps to install your skylight shade quickly and easily.
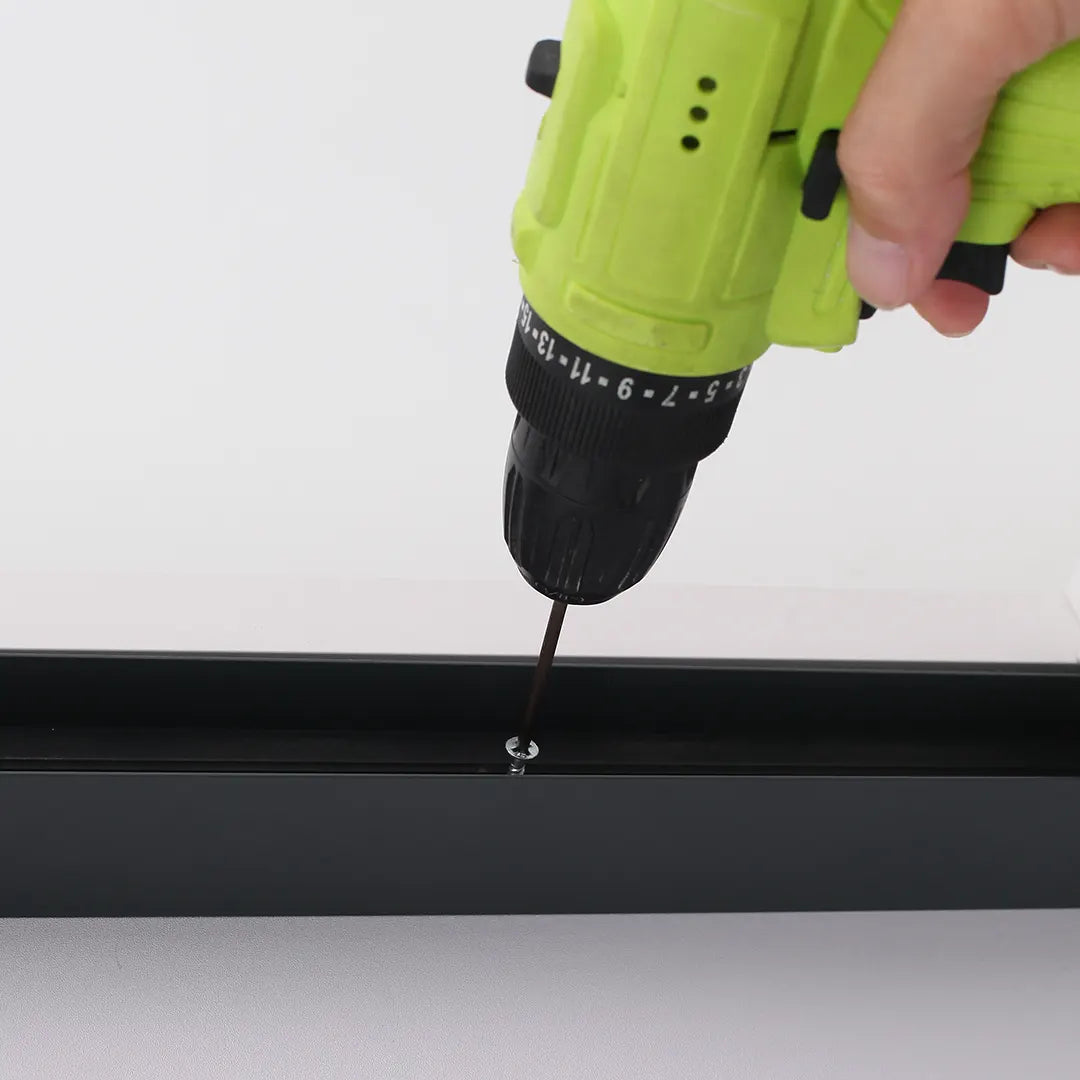
Step 1: Secure the Bottom Aluminum Frame
Place the bottom aluminum frame of the skylight shade at the base of the skylight and fasten it with screws.
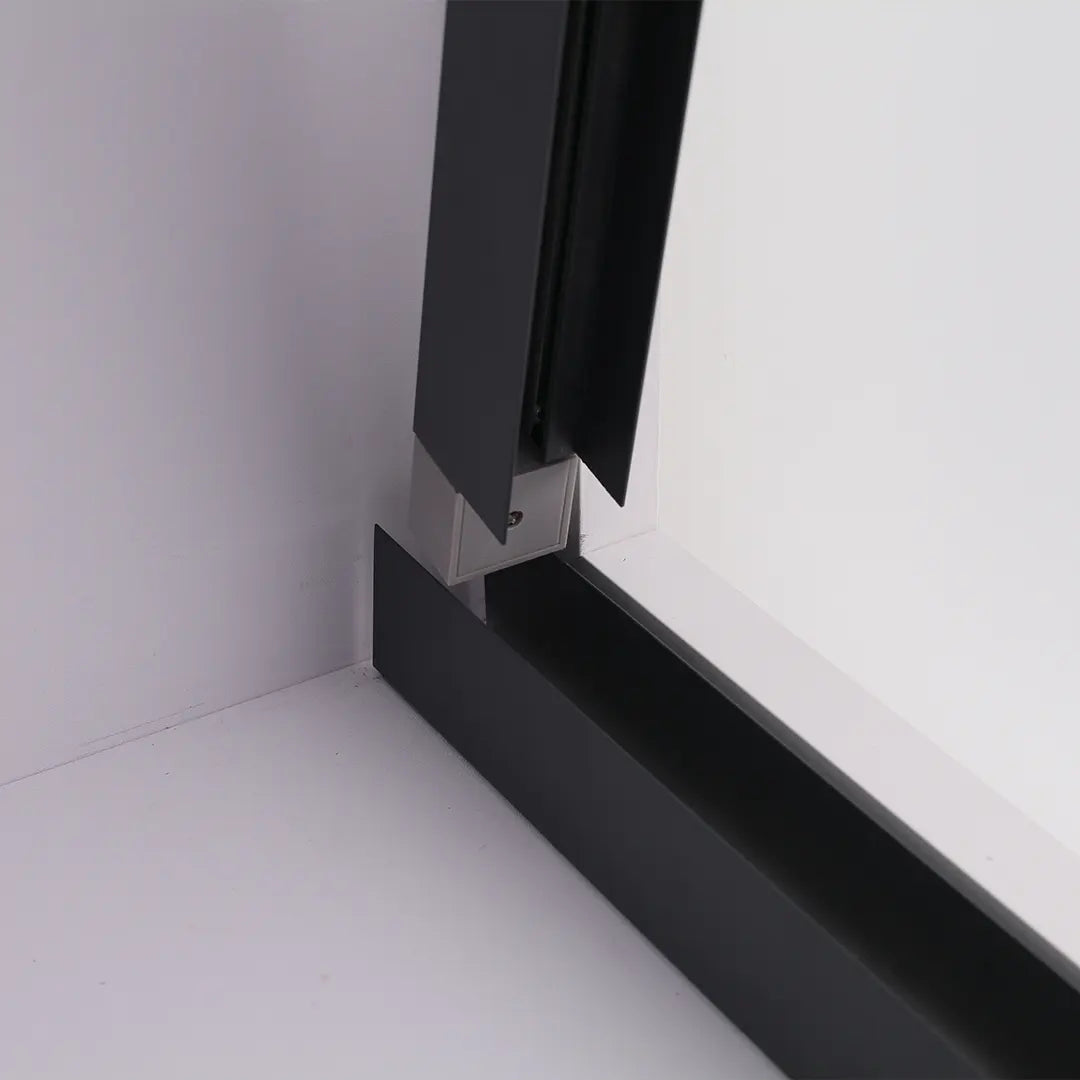
Step 2: Insert the Side Tracks
Slide the two side tracks into the slots of the bottom aluminum frame.
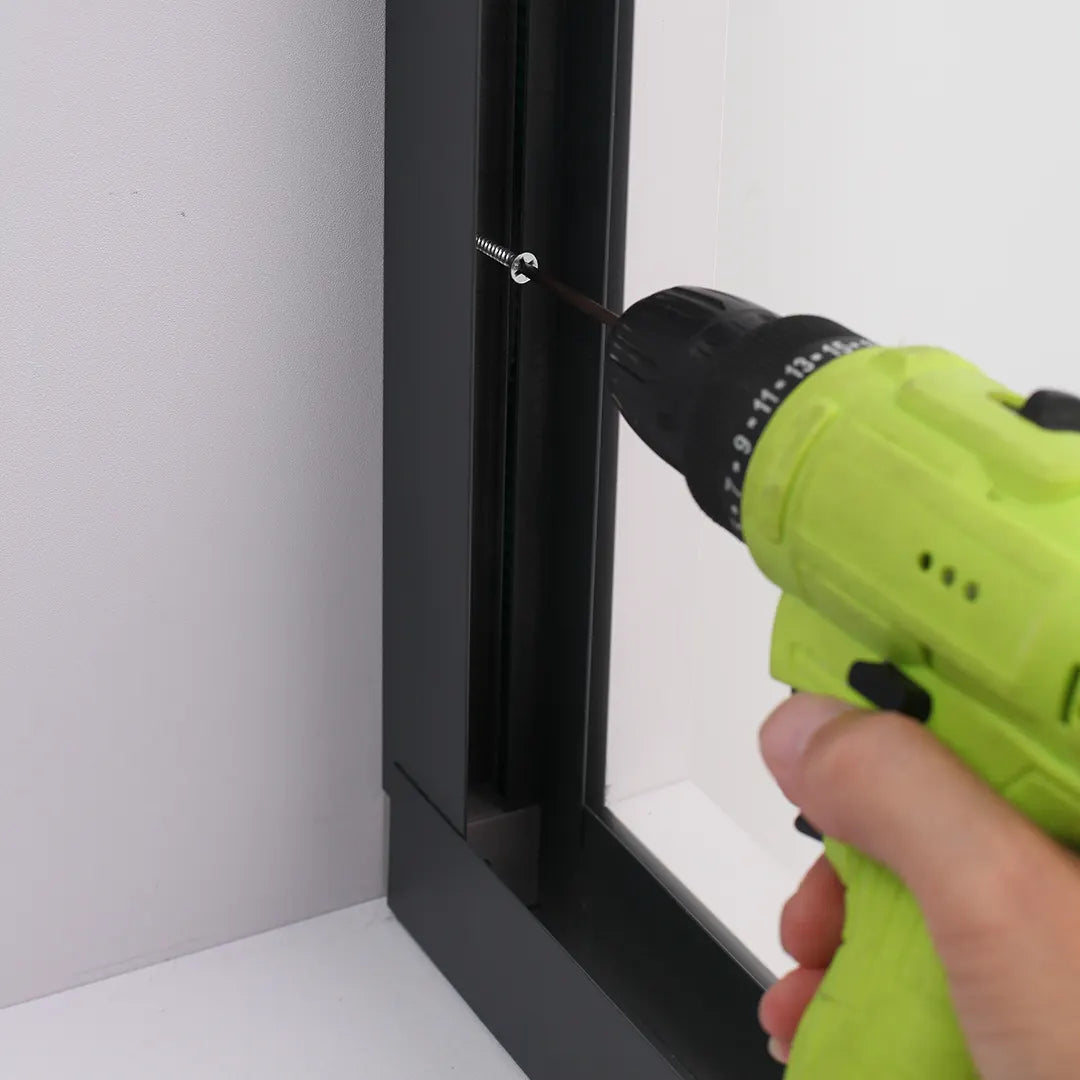
Step 3: Fasten the Side Tracks
Use screws to securely fix both side tracks in place.
Step 4: Snap in the Headrail Ends
Insert each end of the headrail into the clips on the side tracks.
Step 5: Position the Headrail at the Top
Push the headrail to the top and slot it into the top ends of both side tracks.
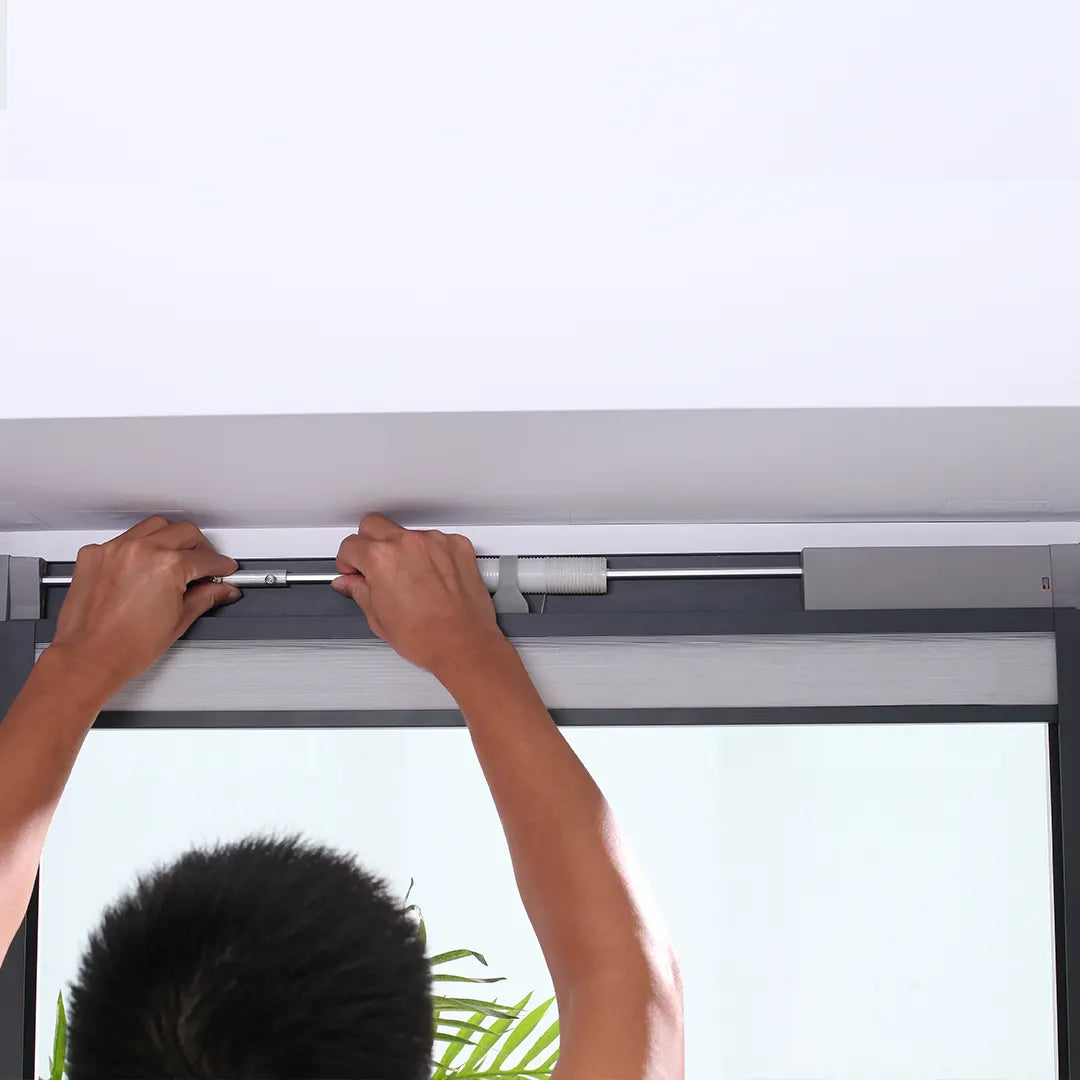
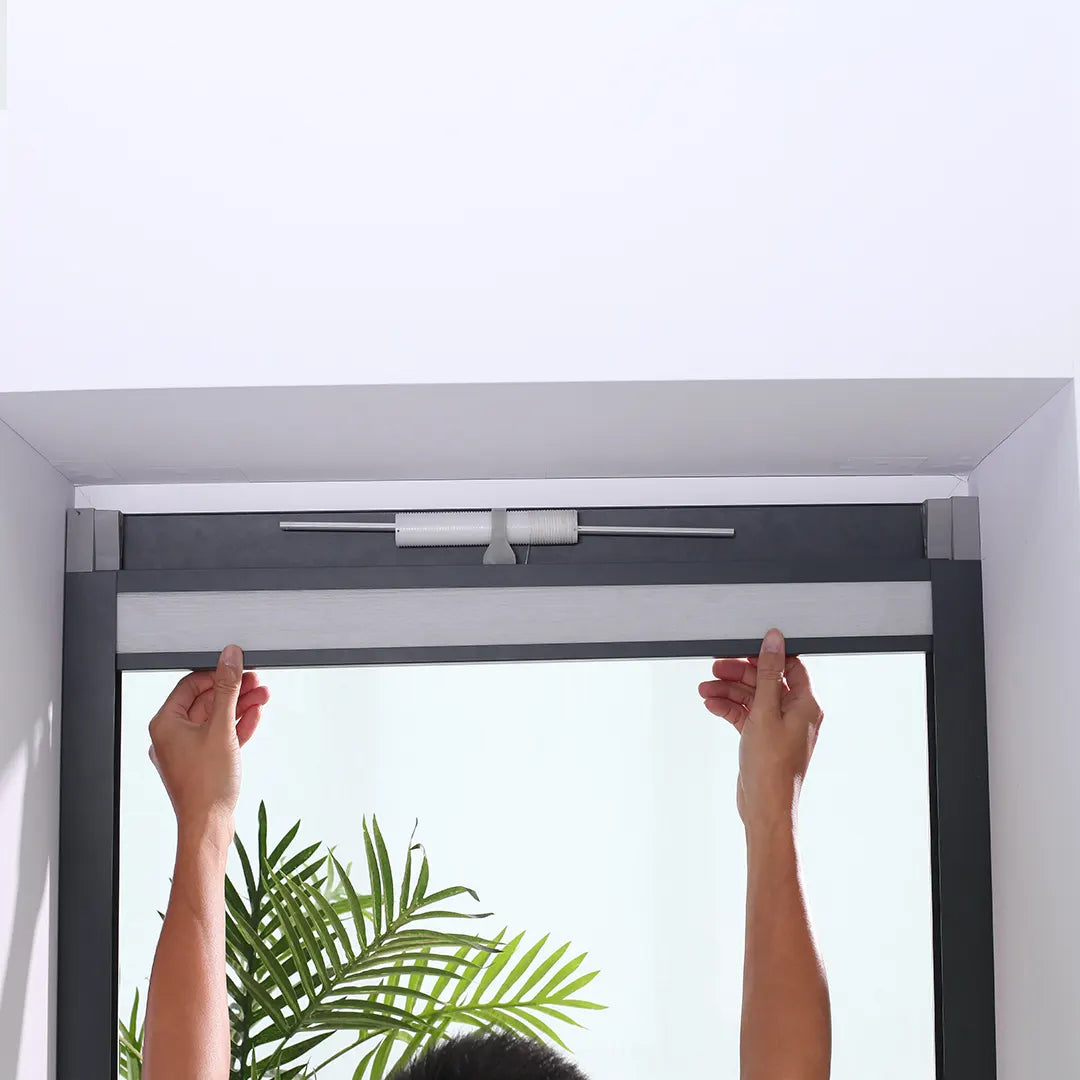
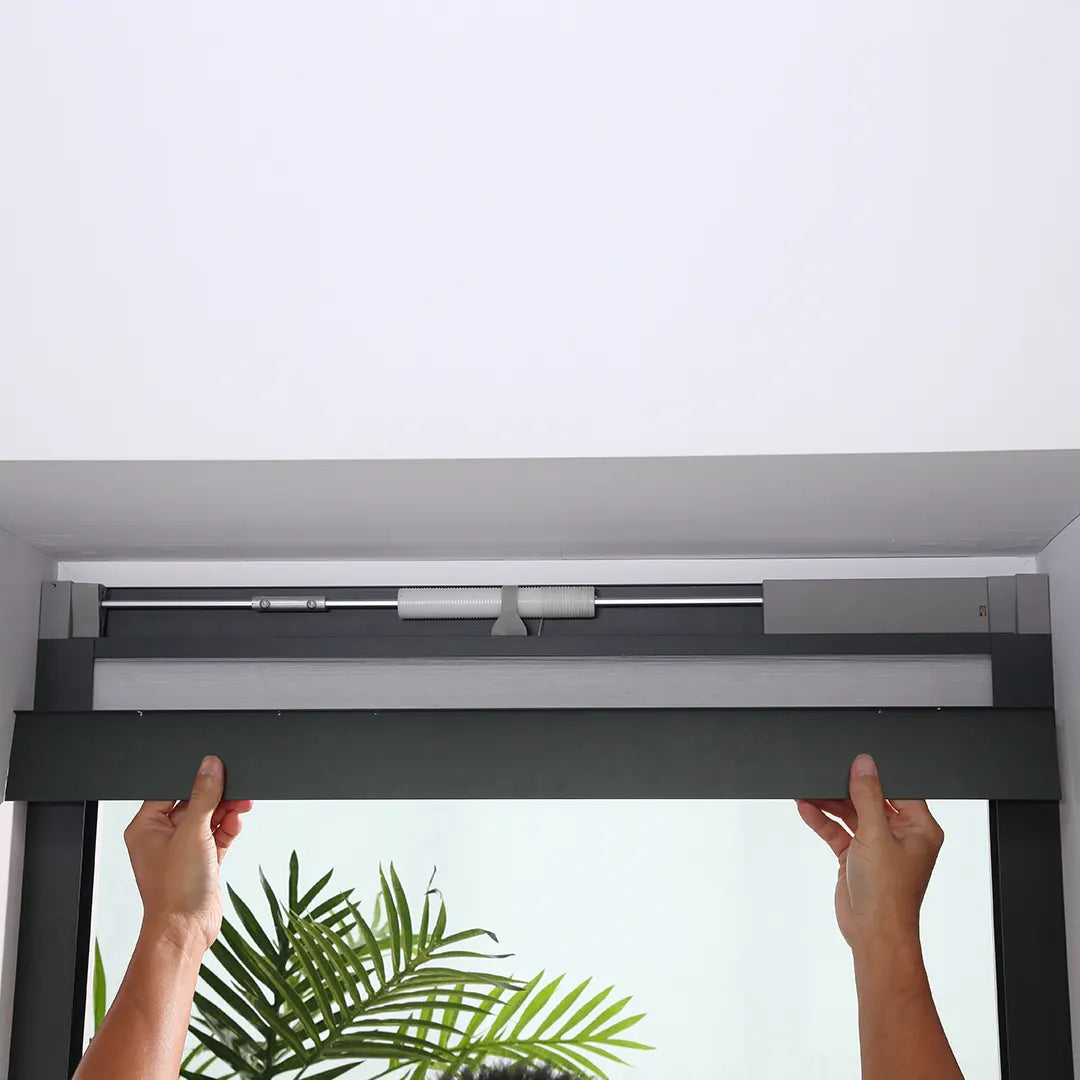
Step 6: Install the Motor and Connect the Drive Rod
Install the motor and connect the drive rod. If a cord spool is included, check that the cord is evenly arranged on the spool and tighten it.
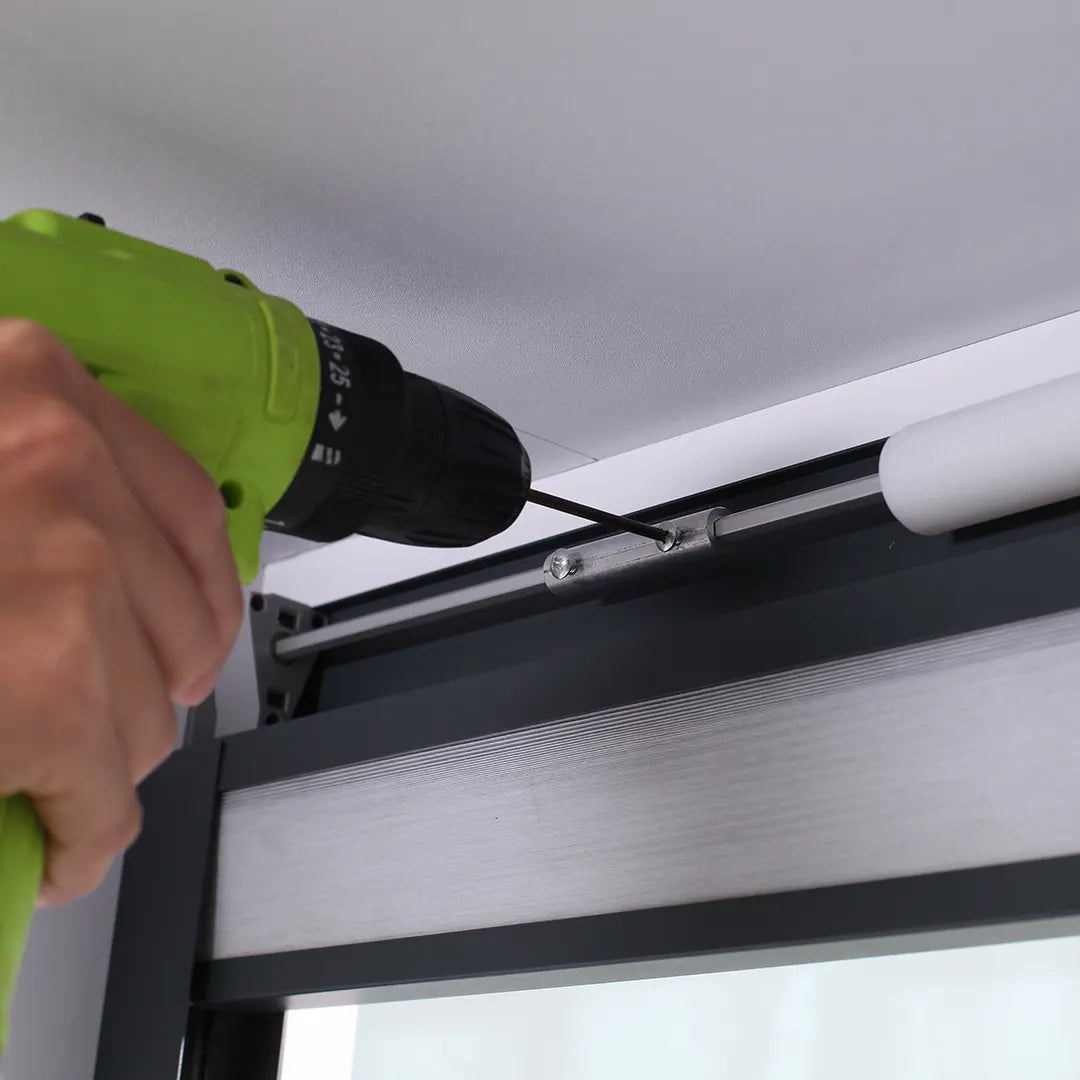
Step 7: Secure the Drive Rod
Fasten the drive rod with screws to ensure it is stable.
Step 8: Attach the Skylight Shade Cover
Place the cover over the mechanism to protect the motor and roller components.
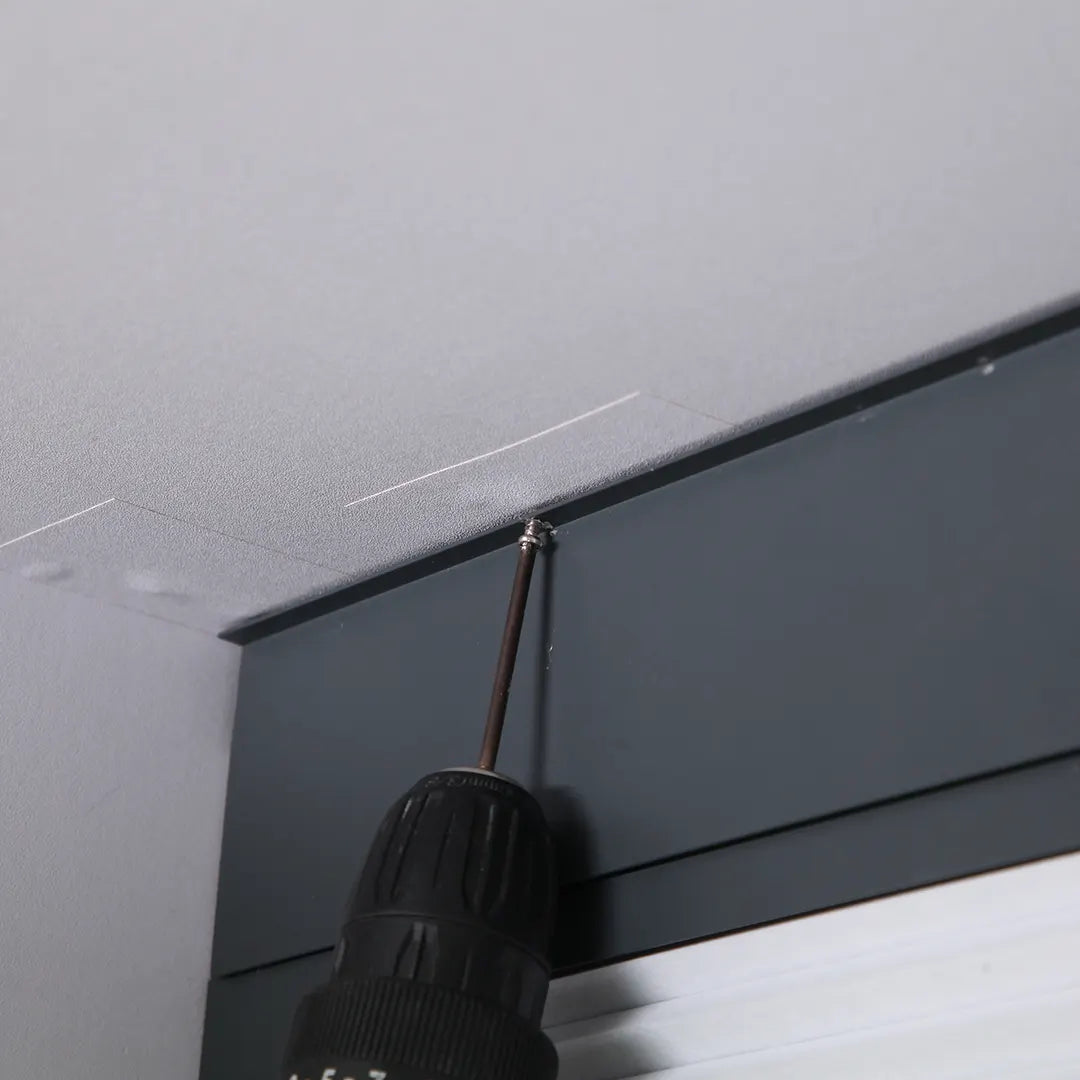
Step 9: Fasten the Cover and Complete Installation
Secure the cover with screws and verify that all components are properly installed.